Create the Apple App
- To begin, access the website https://developer.apple.com/account/resources/identifiers/list and proceed to log in to your account.
- Once logged in, locate the Blue (+) icon adjacent to Identifiers and click on it. From the options presented, choose App IDs and click the “Continue” button.
- Select the App option as the type and proceed by clicking the Continue button.
- Provide a brief description of the app in the appropriate field.
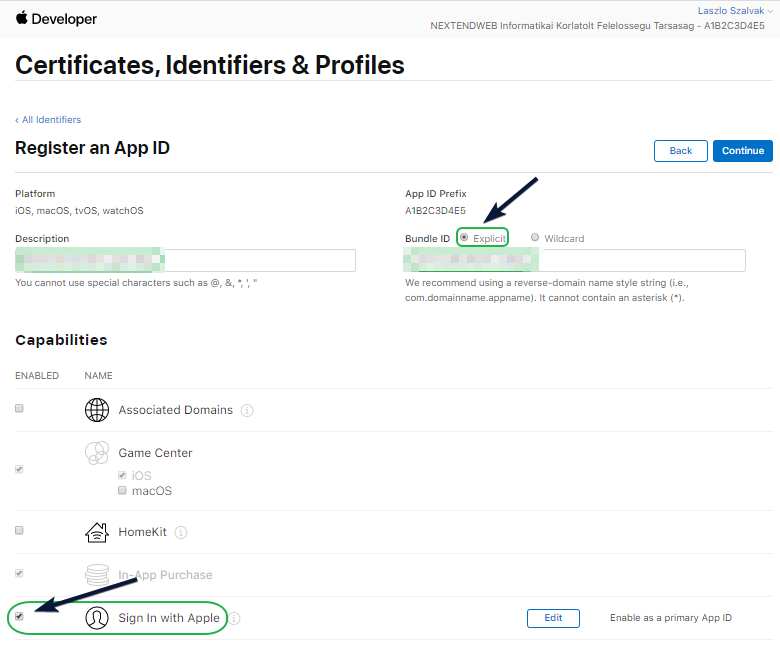
- In the Bundle ID field, opt for the Explicit choice and enter your domain name in reverse-domain style, with the app’s name at the end. For instance, if your domain is mydomain.com and your app is named nslapp, the bundle ID should appear as com.mydomain.nslapp.
- In the Capabilities section, ensure to check the box next to Sign In with Apple.
- Once again, scroll upwards and click on the Continue button, followed by the Register button.
Create the Apple Key
- On the left-hand side of the screen, locate and select the tab labeled Keys.
- Select the blue icon with a plus symbol (+) situated next to the heading labeled Keys.
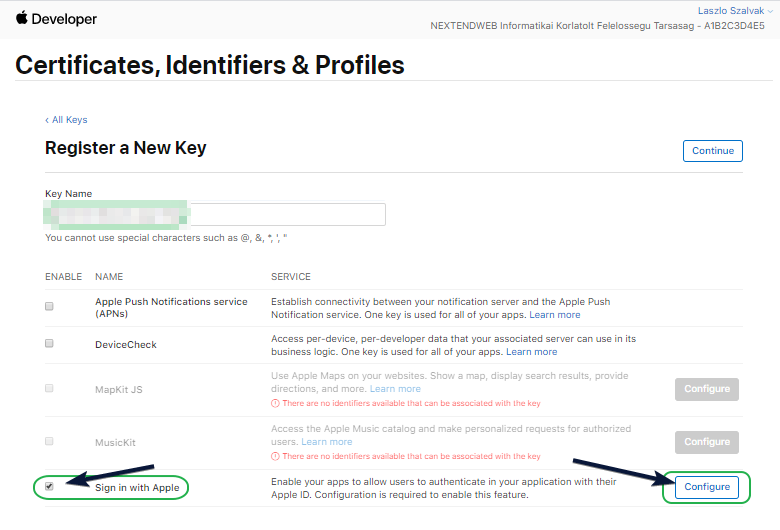
- Input a name into the designated field for the key name.
- Check the box for the Sign In With Apple option, and subsequently, click on Configure.
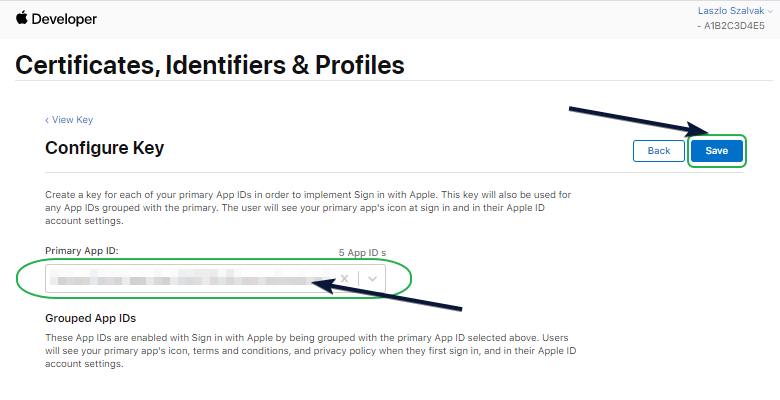
- If you have multiple apps, navigate to the Choose a Primary App ID field and select the app that you have just created. Afterward, click on Save.
- Lastly, click on the Continue button, and then proceed to click the Register button.
- Please refrain from downloading the key at this moment.
Create the Apple Service
- To proceed, follow the instructions below for navigating to the Services IDs section within the Identifiers tab.
- Look for the blue (+) icon next to “Identifiers” and click on it.
- From the options presented, select Services IDs and click the Continue button.
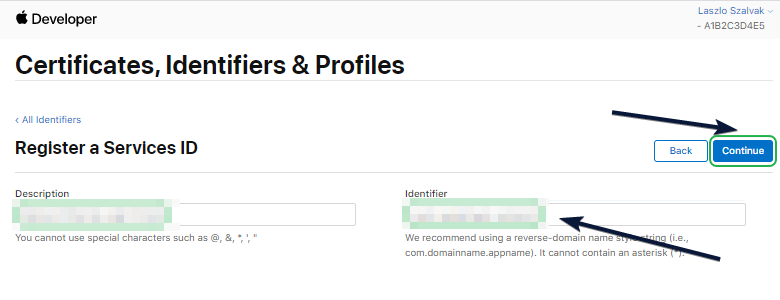
- Provide a brief description of the designated field.
- In the Identifier field, enter your domain name in reverse-domain name style, with the client’s name at the end. For example, if your domain is “mydomain.com” and the client’s name is “nslclient,” the identifier would be “com.mydomain.nslclient.” Please note that this identifier will also be used as the Service Identifier later on.
- Click the Continue button, followed by the Register button.
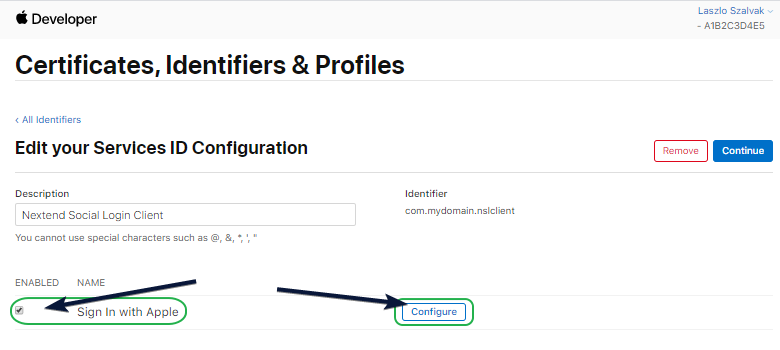
- In the Services IDs section, locate and click on the service you have just created.
- Select the checkbox for “Sign In with Apple” and click the “Configure” button next to it.
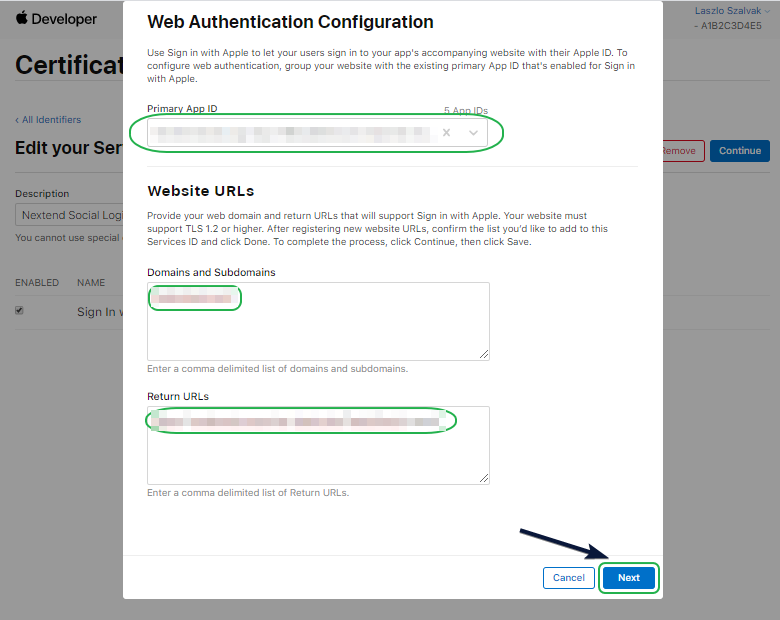
- If you have multiple apps, choose the app you have just created in the Primary App ID field.
- Enter the suggested domain in the Domains and Subdomains field, as recommended by Nextend Social Login.
- Add the suggested URL to the Return URLs field provided by Nextend Social Login.
- Click the Next button and then press the Done button.
- Finally, click the Continue button and then click the Save button.
Configure Digits to Apple Social Login
- Log in to the WordPress Dashboard, locate the Digits Plugin Dashboard, and click the “All Addons” option under Addons Label.

2. Scroll down to find Social Logins Addon, and click on the Download icon.

3. Now click on Social Logins under Addons Label.

4. Scroll Down and find the Apple section and toggle Enable Apple option ON

5. Now get all the required Credentials from your Apple Developer Dashboard (Client ID, Team ID, Private Key ID, Private Key) and paste them into the respective fields. Also, copy the Redirect URL. You are ready to go!
