Setting up WhatsApp Cloud API with WPNotif is super simple but includes multiple steps to get things going, so to make it easy we’ll be breaking the documentation into multiple parts, so if you already have any of the part already setup then you can skip that.
None of the steps require any development or coding knowledge
- Setup Meta Business Manager Account
- Create Meta App
- Connect your Phone Number with WhatsApp Cloud API
- Get message template approved by Meta/WhatsApp
How to set up Meta Business Manager Account
1. Go to https://business.facebook.com/ -> Click on Create an account otherwise login directly with your Facebook account.
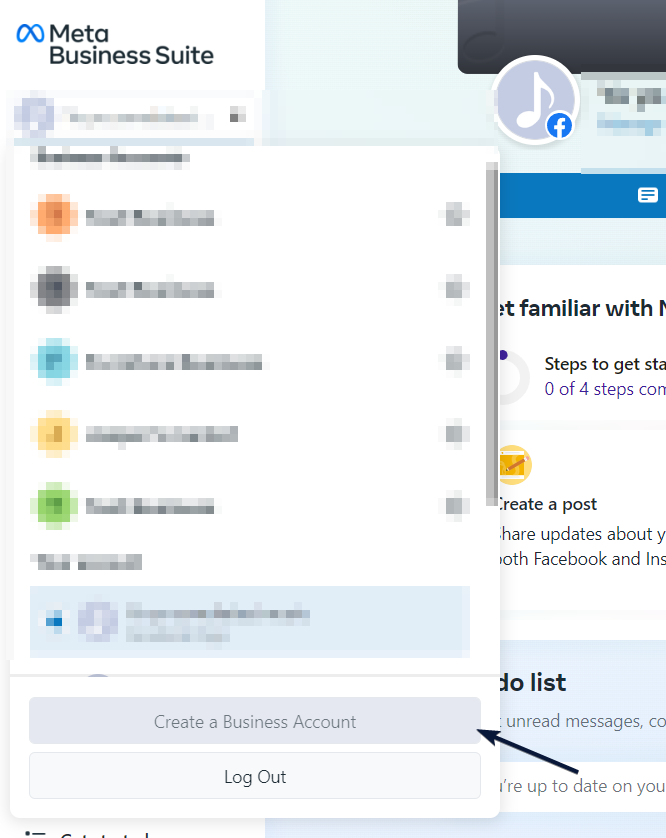
2. Click on Create a Business Account.
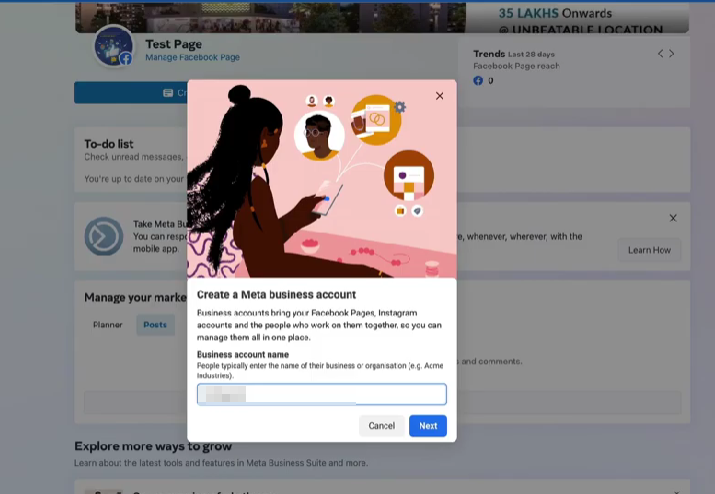
3. Type a name for your business account and click on Next.
4. Enter your full name and email address and click Create
5. After this step click on next and confirm
6. Click on Business Settings
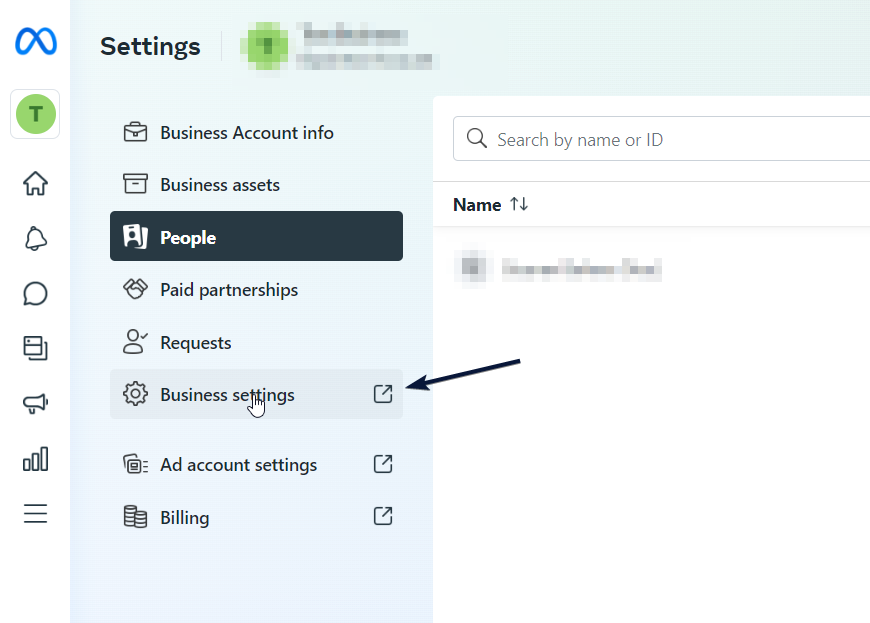
7. Scroll down and click on Business info
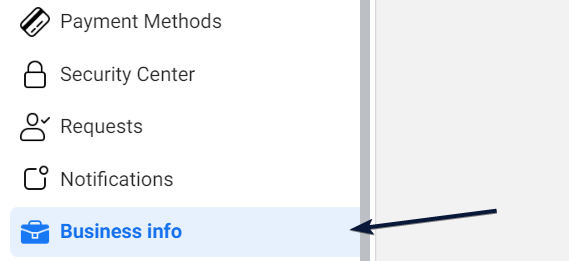
8. Click on Edit to update your business Information.
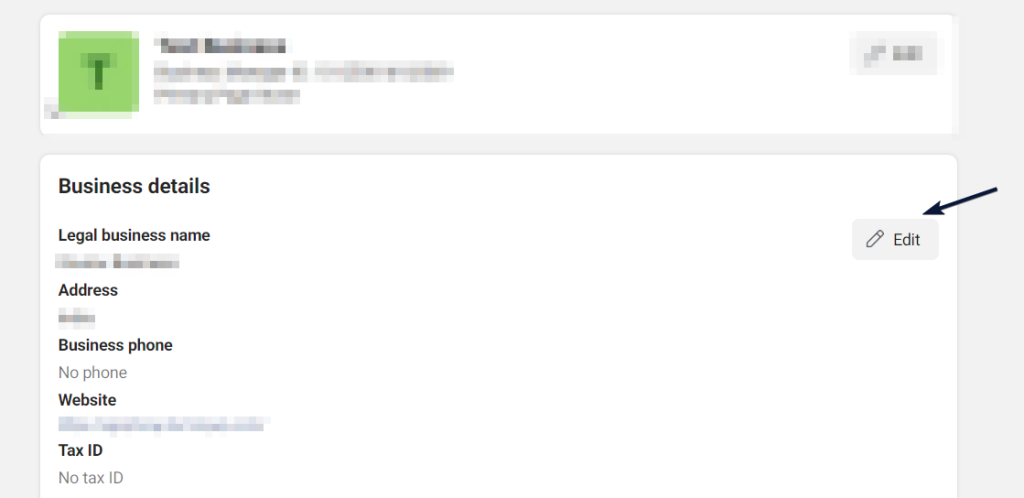
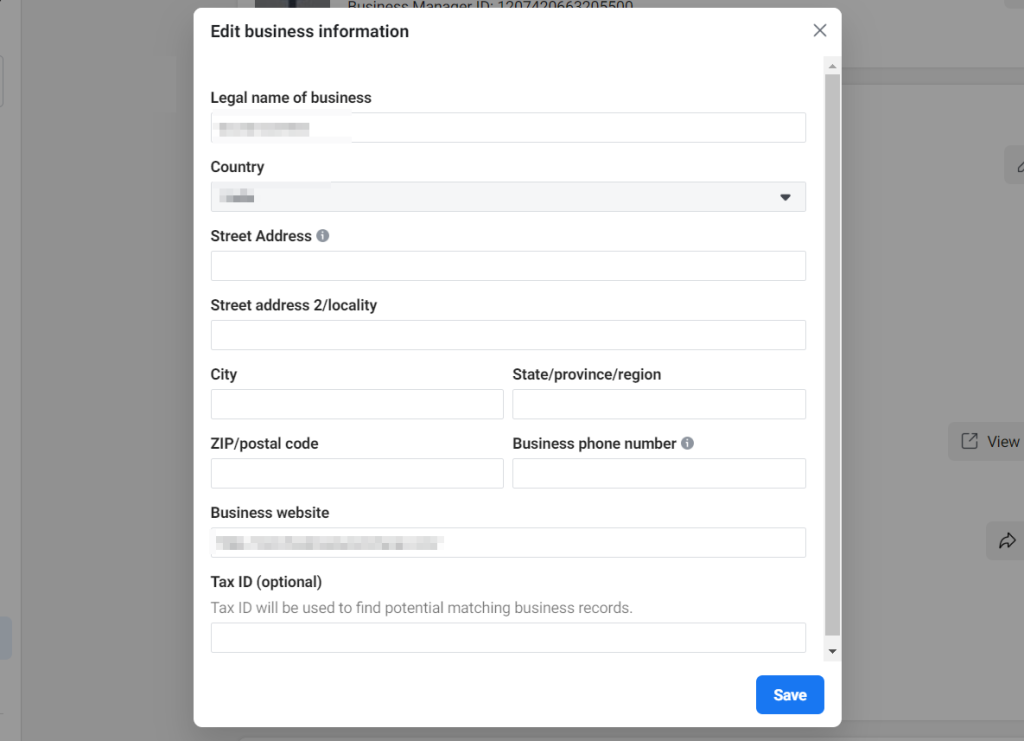
9. Fill in all of your details and click on Save to continue.
10. At this point, you would need to go to your mail service and check for mail from Facebook
11. Click on Confirm, to confirm your business account.
12. Now you are all set.
How to create Meta App
1. Go to https://developers.facebook.com/ , click on Get Started

2. Click on Continue.
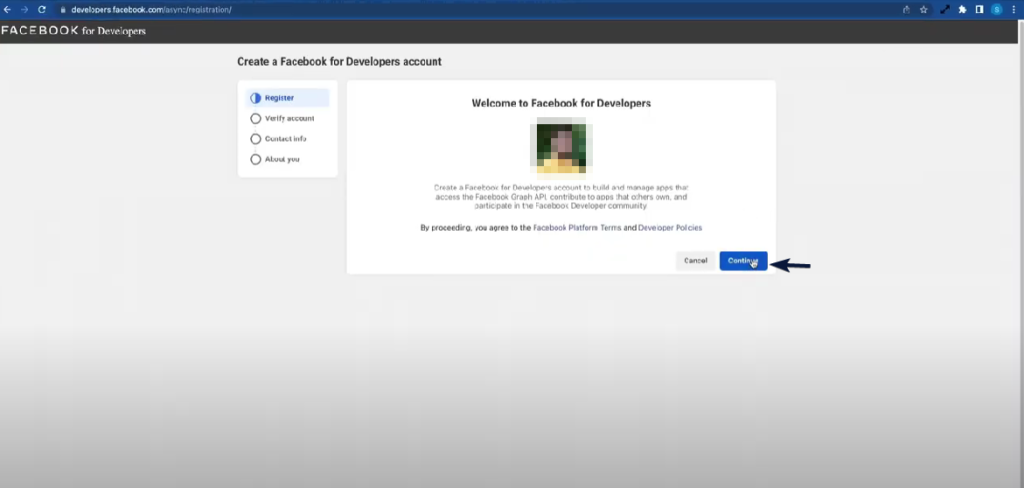
3. on Developer -> Complete Registration.

4. Go to My Apps

5. Click on Create App.

6. Click on Business as shown below, scroll down and click on Next.

7. Enter a name for your App, enter your email
8. Select your business account from the dropdown
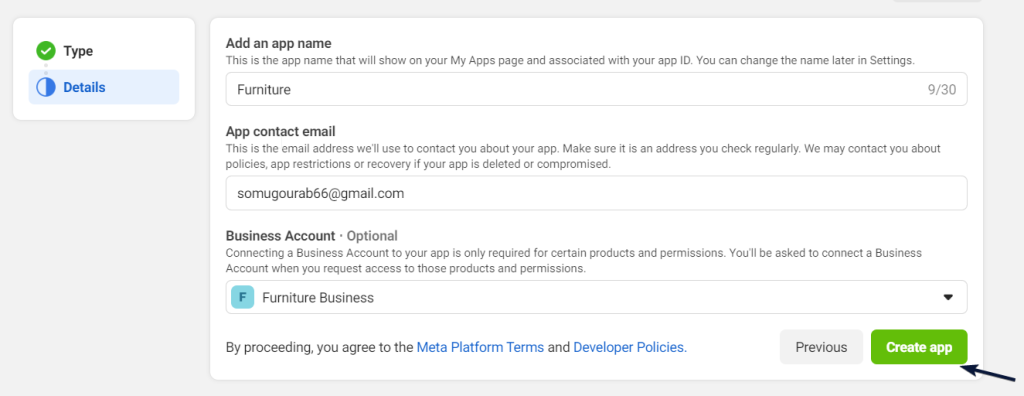
9. Then click on Create App, and it will ask for your Facebook password, enter your password and it’s done.
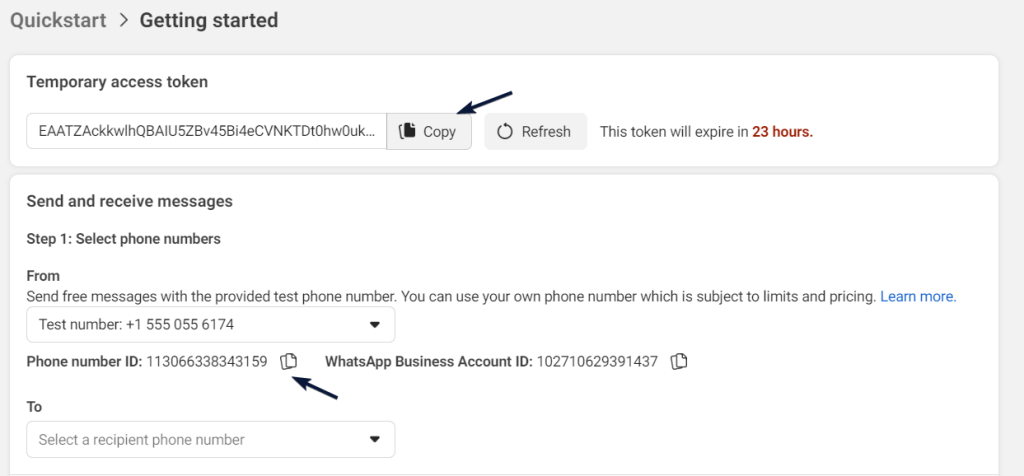
10. Scroll down and press Set up in WhatsApp Integration.

11. Copy the Temporary Access Token
12. Copy the Phone Number ID (This is the Phone Number provided by the company) See below to know how to set up your own mobile number.
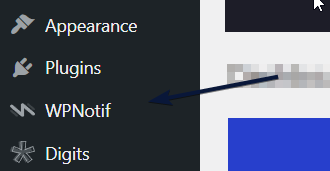
13. Go to Your WordPress dashboard -> select WPNotif
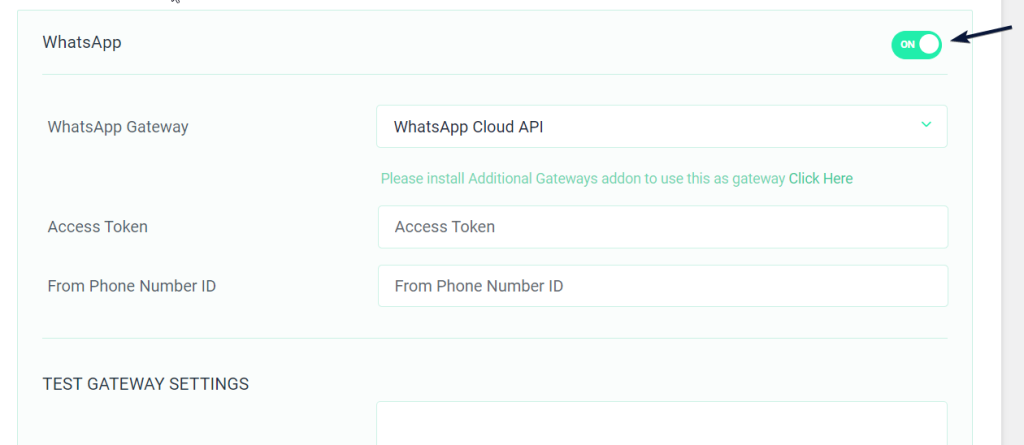
14. Under Gateway -> Scroll down find WhatsApp and enable it.
15. Now Go to WhatsApp Gateway -> select WhatsApp Cloud API
Copy and Paste the Access Token and the Phone Number ID
How to connect your Phone Number with WhatsApp Cloud API
1. Scroll down on the same page and Click on Add Phone Number (as shown below)

2. Fill in all of your details and click on Next.
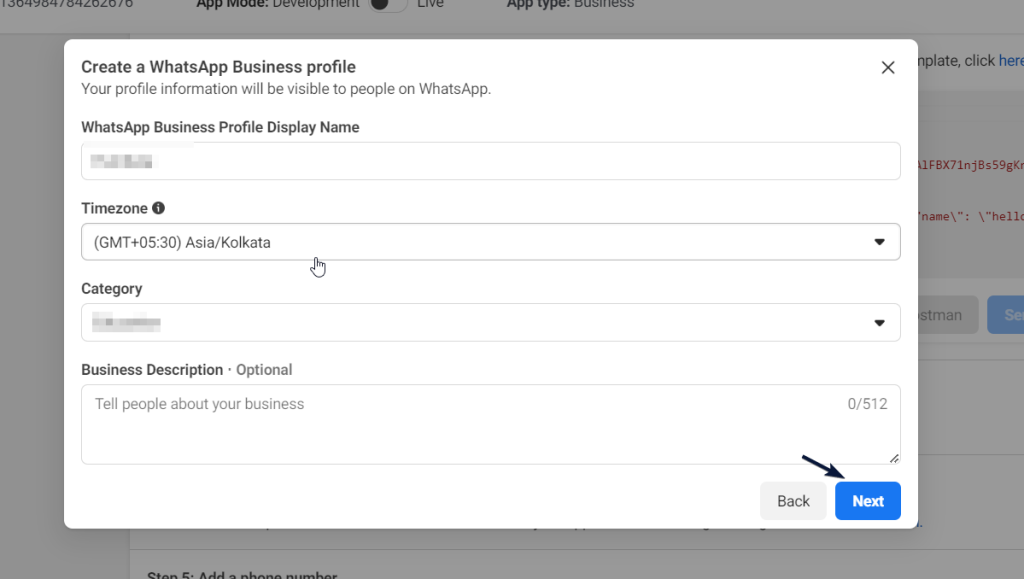
Note:- This should be a number that is not associated with any WhatsApp account.
3. Click on Next and verify your mobile number
- It takes some time and will verify your number.
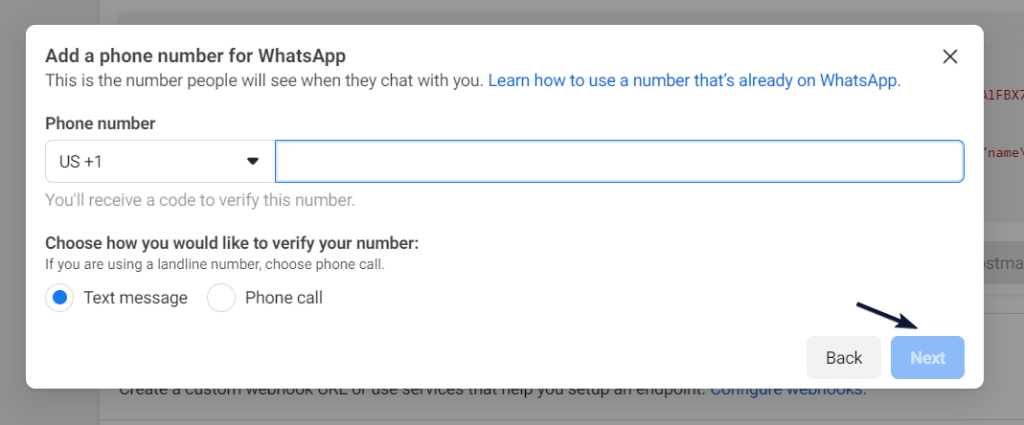
4. Now at this point again copy the Access Token, and phone number ID, and paste it into WPNotif Phone number ID Space

5. Now your WhatsApp Cloud API is all set.
How to get message templates approved from WhatsApp.
1. Scroll down and click here (as shown below)
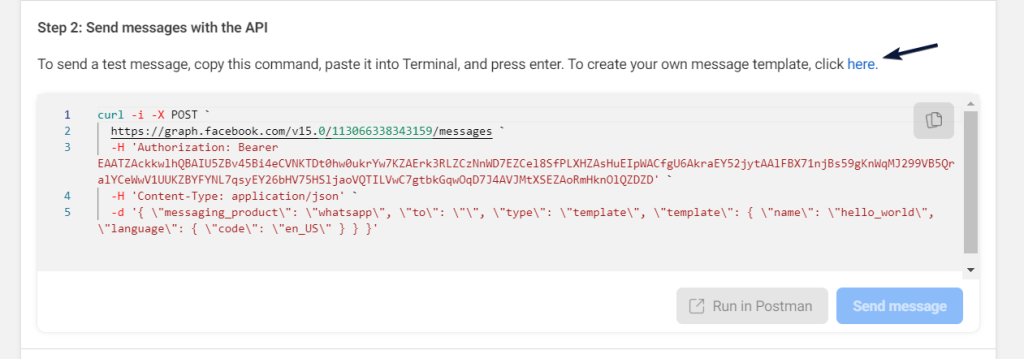
2. Click on Create Template

- Select the category of message you want to send
- Enter a name to your Message Template
- Enter the Languages you need in your message
- Then click on Continue
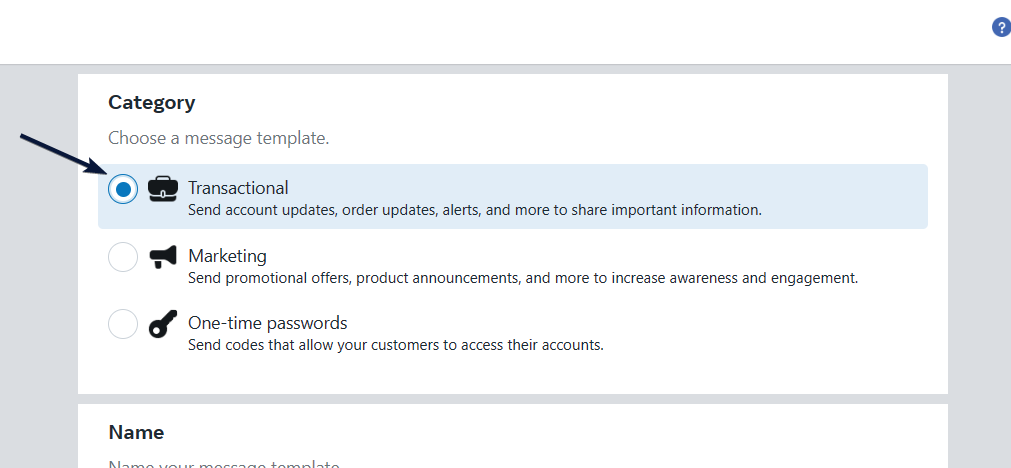
You can refer to: https://developers.facebook.com/docs/whatsapp/message-templates/guidelines/ to check the template creation guidelines.
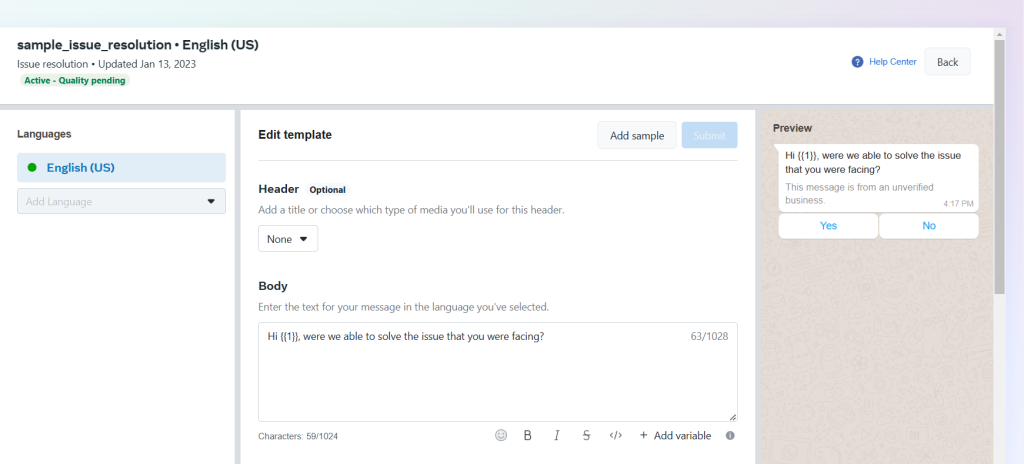
3. Enter the custom message you want to send inside the body and submit.
Example of a template
{{1}} – these are the variables you can use to use your custom data; you can add any number of variables as per your need.
4. Now that you have created your custom template, copy the template name.

5. Go to WPNotif in WordPress – > https://help.unitedover.com/wpnotif/gateway-settings/
Select your Gateway (WhatsApp Cloud API)
Copy the template.
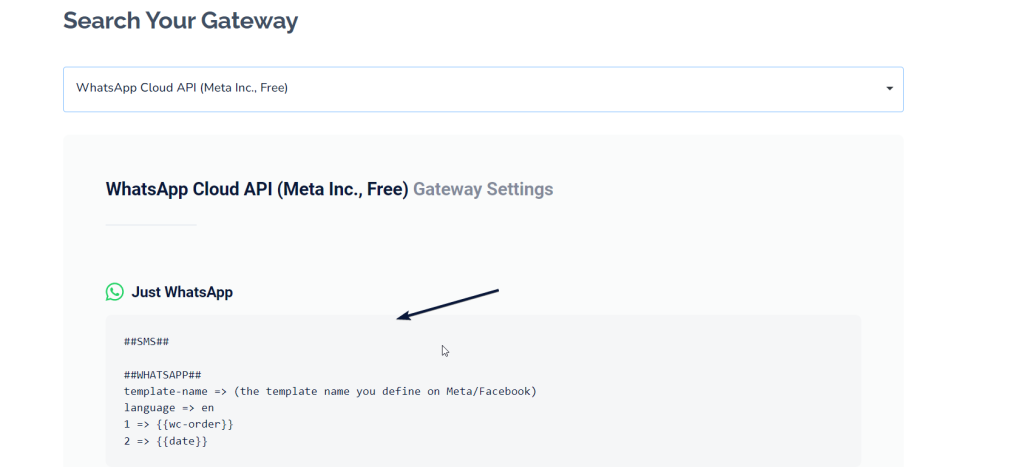
6. Paste the template here
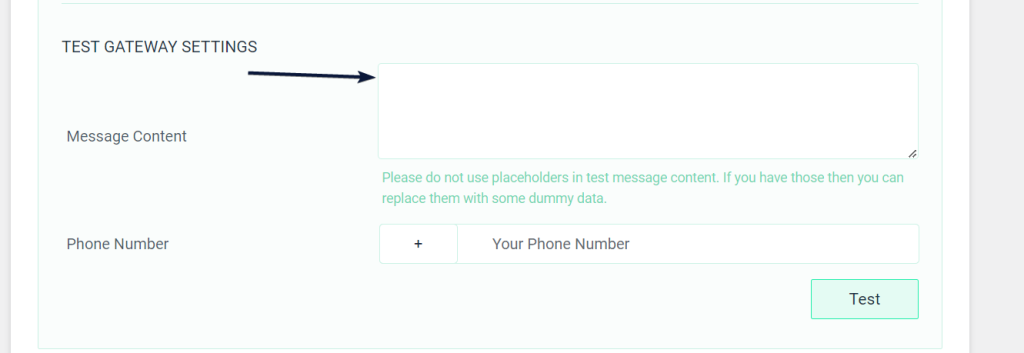
7. Change the template name (Add the name of the template you had created)
Also, put your custom data in place of variables. {{1}}.

Now it is all set.