• HOME
  • KNOWLEDGE BASE
  • FAQ
  • CONTACT US
  • HOME
  • KNOWLEDGE BASE
  • FAQ
  • CONTACT US
Home/Knowledge Base/How To/How to Whitelist IP in Brute Force Protection

How to Whitelist IP in Brute Force Protection

1. Log in to the WordPress Dashboard, locate the Digits Plugin Dashboard, and click the “Miscellaneous” option under General Lable.

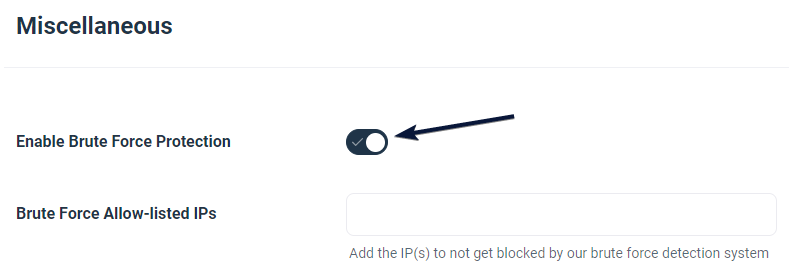
2. Make sure that Enable Brute Force Protection option is Enabled.

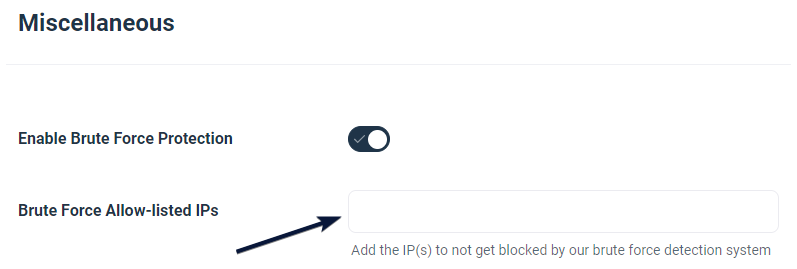
3. Now, add the IP Address which you want to allow login in the Brute Force Allow-listed IPs field. That’s it you have successfully added the Whitelist IP address on your login page.

Was this helpful?

Yes  1 No
How To
  • How to Whitelist IP in Brute Force Protection
  • How to Force Users to Log in
  • How to restrict certain Phone Numbers from Signup
  • How to setup User or User Role Based 2Factor or 3Factor Authentication
  • How to Disable Phone Number Verification on Signup
  • How to add a test Number in Firebase
View All 33  
Categories
  • Addons
  • Common Errors
  • Gateway Setup
  • Getting Started
  • How To
  • Page/Popup Builder
  • Social Login

  Plugin text translation

How to Use Yubikey with Digits  

    • Made with ❤ by Humans on 🌎